

>> PLANNING GUIDES & MAPS
Posted on July 19, 2016
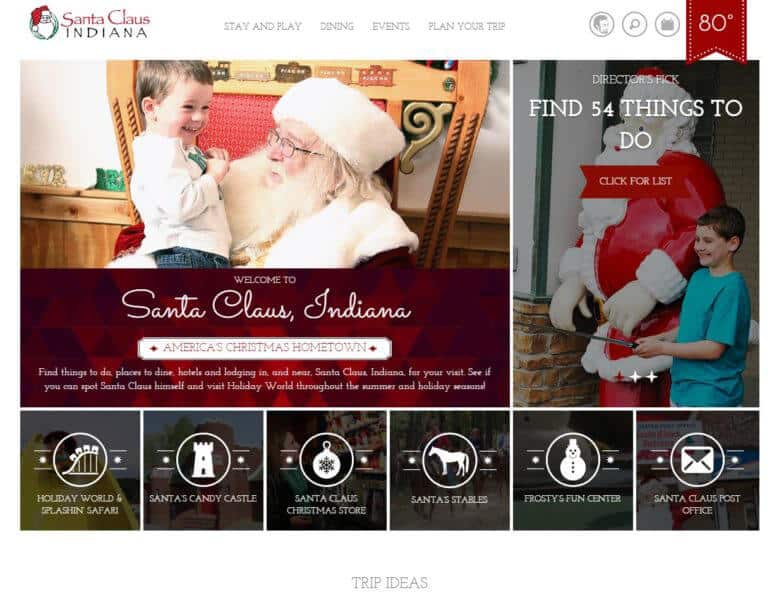 STEP 2: Browse through local accommodations, restaurants, upcoming events, and things to do. The fastest way to browse each category is to use the links provided at the top of the page. This is the fun part!
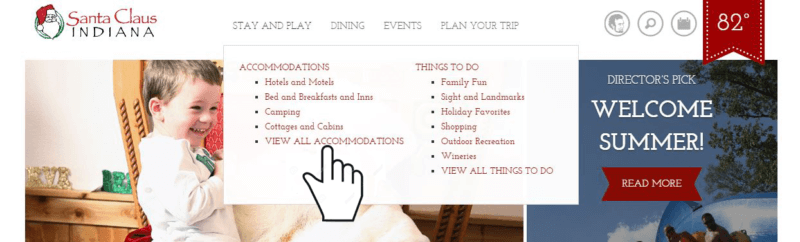 STEP 3: As you come across things that interest you, click “Add to Planner.”
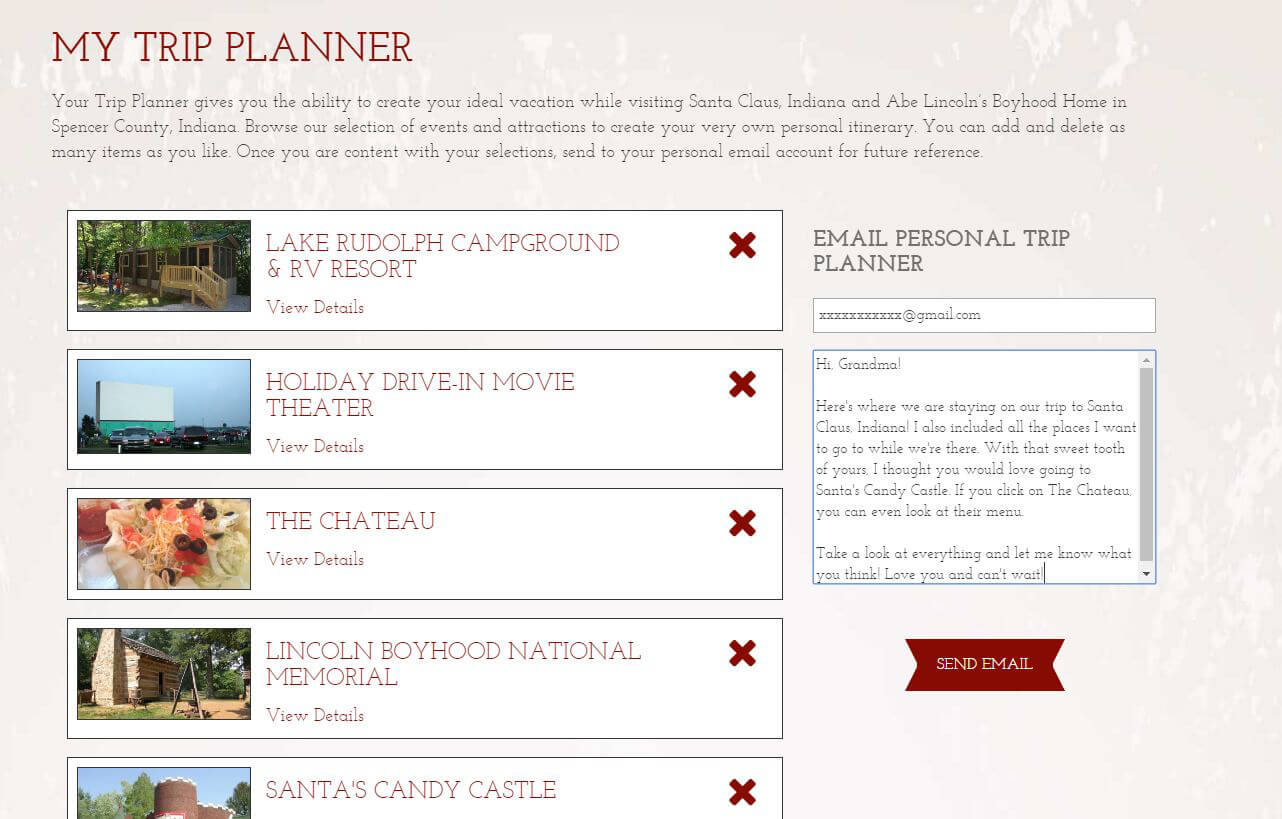
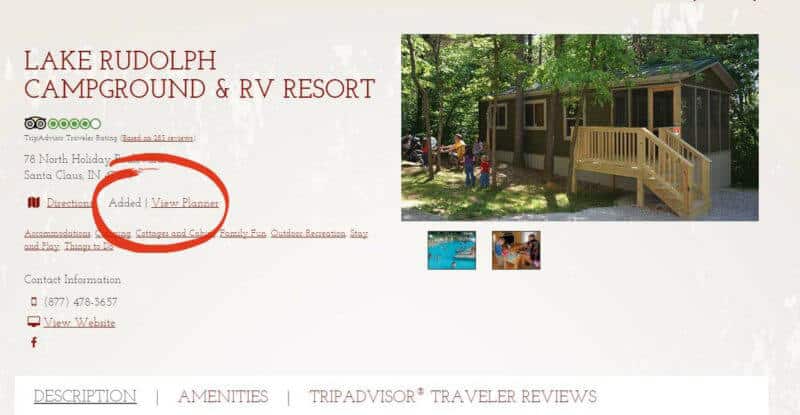
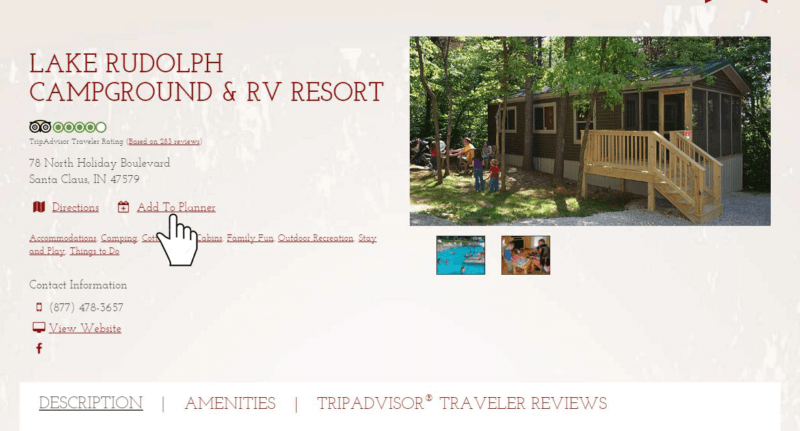 As you add your interests to your planner, your screen will now look like this:
 STEP 4: Once you've finished adding things that interest you, click on the "Trip Planner" icon located in the top right of your screen, right in between the current temperature icon and the search icon.
 STEP 5: Now, if you’re happy with the trip you've planned out, you can enter your email address to share the plan with yourself, or add the emails of friends and family so they’ll know the itinerary and everyone will be on the same page.
 STEP 6: Well, actually there isn't a step 6. Because you're all finished! Wasn't that super easy and convenient? You were able to pick your lodging, restaurants, and all the activities that interest you, as well as check out events that will be happening during your trip...all in just a few clicks. Now you can print your itinerary, or keep it close by in email so you can check it out anytime.
If you have more specific questions about your upcoming trip, don't hesitate to contact us. We're more than happy to help. Otherwise, we hope you enjoy your trip and don't forget to stop in the Visitors Bureau to say hi—we love chatting with all the different travelers that visit the area.
STEP 6: Well, actually there isn't a step 6. Because you're all finished! Wasn't that super easy and convenient? You were able to pick your lodging, restaurants, and all the activities that interest you, as well as check out events that will be happening during your trip...all in just a few clicks. Now you can print your itinerary, or keep it close by in email so you can check it out anytime.
If you have more specific questions about your upcoming trip, don't hesitate to contact us. We're more than happy to help. Otherwise, we hope you enjoy your trip and don't forget to stop in the Visitors Bureau to say hi—we love chatting with all the different travelers that visit the area.
For current destination information, visit SantaClausInd.org/open.
VISITOR CENTER INFO
Spencer County Visitors Bureau
25 West Christmas Blvd. Santa Claus, IN 47579
Visitors Bureau Hours:
Monday through Friday
8:00 am to 4:30 pm CT (888) 444-9252
Spencer County Visitors Bureau. All Rights Reserved.
Privacy Policy and Terms of Service
Accessibility Statement
By visiting or interacting with SantaClausInd.org, you are acknowledging and agreeing to our Privacy Policy and Terms of Service.
Learn More.


 SEARCH
 NEWSLETTER
 TRIP
TRIP MAP
MAP